Annotating
Make sure a paper is selected in marker window and click the annotate & mark button. After a moment the “annotate” window will appear:
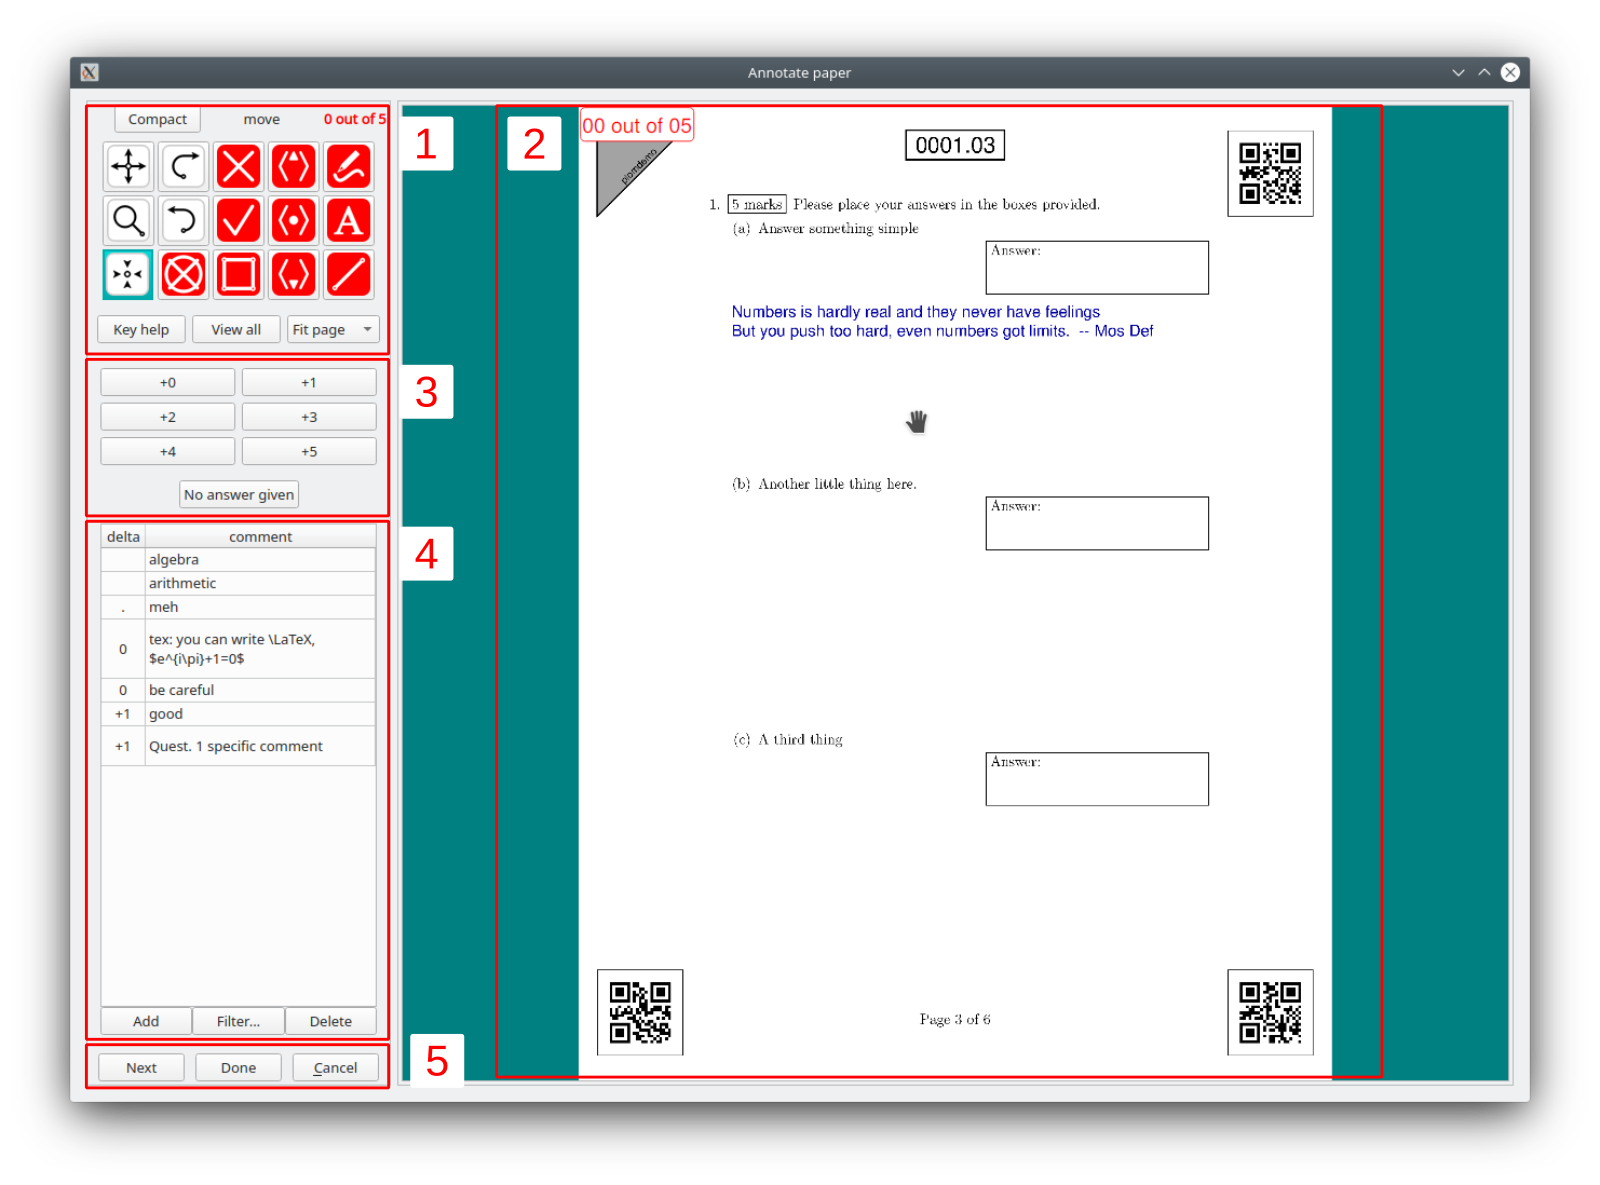
Again, this window has quite a few features. Click on the above image to bring up an annotated version which corresponds to the numbers below.
- Tools, views and information
- The page-images
- Delta-tool
- Standard comments
- Next, done, and cancel
1. Tools, views and information
In the top-left of the annotator window you’ll find tool-buttons and some information.
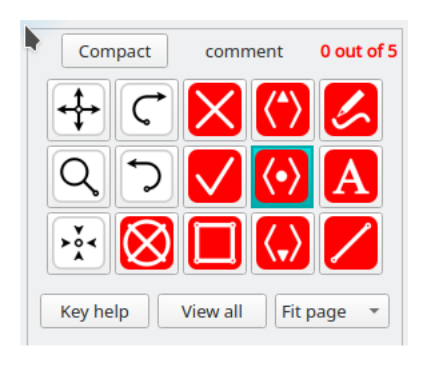
We have put information on the 15 different tool buttons on its own page. Otherwise you’ll see
compact– this button switches the annotator between its wide (default) and compact view. In compact view much of the left-hand side of the annotator is hidden giving you more space to view the page-images on the right.comment– this is the currently selected tool-mode. Note the green highlight on one tool-icon.0 out of 5– this is the current score for this question. You can also (currently) see this stamped on the top-left of the page-images. As you modify the score these are updated automatically.key help– this lists all the various keyboard shortcuts.view all– this opens the whole of the current test (excepting the ID-page) in a different window. This is in case a student leaves a relevant response on a different page.fit page– this drop-down menu allows you to select from a number of different pre-set views of the page-images. Note that you can still zoom-in/out and pan around using+,-and arrow-keys. The space-bar also pans down the page.
2. Page images
Shows all the page-images of the question (left-to-right). Note that the space-bar is a useful way to pan through the view especially for long multi-page questions. It moves down the page (keeping the zoom fixed), and when it reaches the bottom it moves right and to the top of the page.
Note that the current score is stamped at the top-right of the view. This is updated automatically.
3. Delta-tool and no-answer
The delta-tool allows you to add or deduct points (depending on the marking-style) from the score. It simply pastes in $+1$, $+2$, and so forth, depending on your choice.
While it is possible to mark in this way, we encourage you to use standard comments instead since they encourage both greater consistency (and adherence to a rubric), and more feedback to your students.
In the same region of the annotator is the no answer given button. This is a quick way to put a cross through the entire page, mark it with 0 no answer given. This should only be used if the page is entirely blank and you have made no annotations. The system will also ask you to confirm before continuing.
4. Standard comments
See this page
5. Next, done, and cancel
When you have completed annotating and marking the current response, you can leave in three different ways.
- Next – this accepts your annotations and moves on to the next task in your list. This is by far the most common way to finish. Note that the keys-combinations
alt-enter,ctrl-n,ctrl-bdo the same thing. - Done – this accepts your annotations but returns to the marker-window.
- Cancel – cancel and discard the current annotations and return to the marker window. Note that
ctrl-cdoes the same thing.